
STEP 5: Foundations (1 week) Foundations can be made of brick, concrete block, or poured concrete. Stone foundations generally aren’t built anymore, as they aren’t as strong as the others. Stone can be applied as a veneer just like brick, for aesthetic purposes, and you would be wise to use it only as such. Local codes may actually prohibit stone as a foundation load-bearing material.
Your foundation contractor needs to be one of your better subcontractors. Next to your carpenter, he is the most important. Your carpenter probably can recommend a good foundation contractor, as he usually starts his work soon after, if not directly after, the foundation contractor is finished. He knows the good ones. I’m sure he’s had to follow bad ones and probably remembers having to shim walls or compensate in some other way for an out-of-square foundation. Houses can and should have square corners.
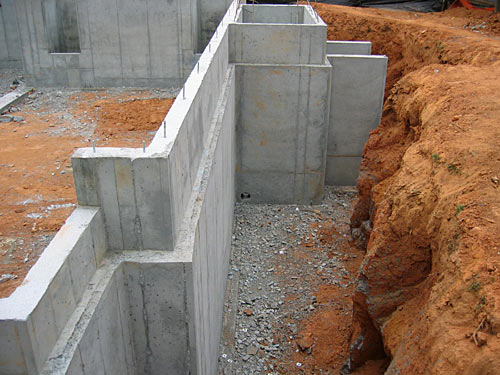
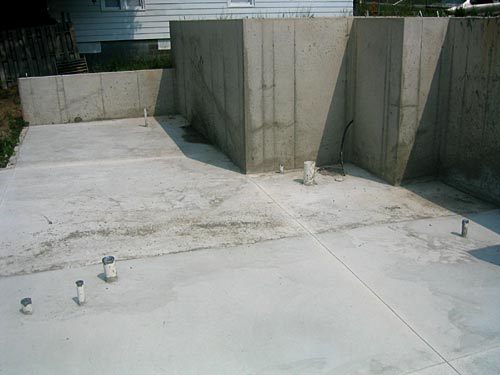
The foundation wall for any type house needs to be high enough so that water will be diverted away from the house by the final grade of the soil around the house. It must also be high enough so that the wood finish and framing of the house will be at least 8 inches above the finish grade and thus protected from soil moisture.
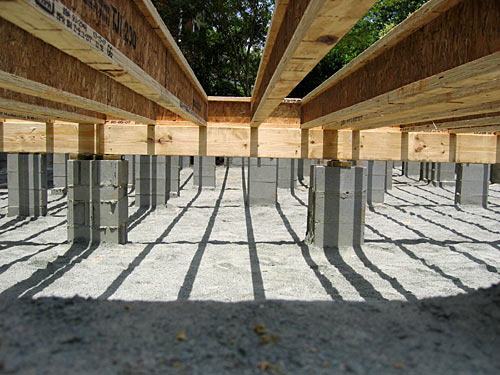
A crawl space should be at least 18 inches high so that you can crawl beneath the house annually to inspect for such things as termite damage. The crawl space walls should have screened openings for ventilation. If you are planning on a full basement, your foundation walls should be high enough so that you have at least 7 feet 4 inches of head space in the finished basement.
If you are in doubt about the foundation height, consult an engineer. Usually you, with the help of the carpenter, foundation contractor, excavator, or anyone who can use a transit or a level, can determine the needed height. If the lot is almost flat, the job is simple. It becomes tricky when the lot is steep or has opposing grades.
Experienced contractors make certain the foundation is high enough at the highest point of the outline of the foundation wall, and use that highest point as the control point.
The finished foundation should be waterproofed from the footing to the finish grade line. I recommend hiring a professional waterproofing company for this. Companies are listed in the Yellow Pages under Waterproofing. A professional company will stand behind its work.
Also, depending on your locale, you may need to have the soil treated for insects and pests, particularly termites. Hire a professional. This job is done after the foundation is in, but before any concrete is poured for either the basement or the garage. The cost is small.
It may come as a surprise to many first-time home builders that the foundation is poured or formed with concrete blocks, then holes are punched in it for such things as the water supply and the sewage outlet, the pipe is placed through the hole, and the space between the pipe and wall is patched. This is the easiest method for getting a tight, waterproof fit.
Step 6: Rough-in-Plumbing (2-4 days)
If you have a basement with plumbing or if you are building the house on a concrete slab (as opposed to wooden floor joists), once the foundation is in and backfilled and tamped (packed down), and the soil treated, your plumber needs to install the sewer line and the water pipes that will be under the concrete.
Also, any wiring that will go under the concrete needs to be placed in a conduit and roughed-in. Most wiring though, can be run through the stud walls and ceiling joists to any given point.
Your soil treatment company may want to wait until the rough-ins are completed before treating the soil so it won’t be disturbed by digging in the plumbing lines. Ask about their policy.
